> ## Documentation Index
> Fetch the complete documentation index at: https://docs.raehost.com/llms.txt
> Use this file to discover all available pages before exploring further.
# Cara Setup Geyser
Untuk crossplay Java dan Bedrock, minimal RAM yang dibutuhkan adalah 4 GB. Pastikan RAM mu cukup ya. Karena kalau dibawah 4 GB, bisa menyebabkan Out of Memory (OOM) yang dapat menyebabkan world mu crash.
Untuk melakukan ini, kamu perlu login ke panel melalui [https://panel.raehost.com/](https://panel.raehost.com/) Kemudian pilih servermu.
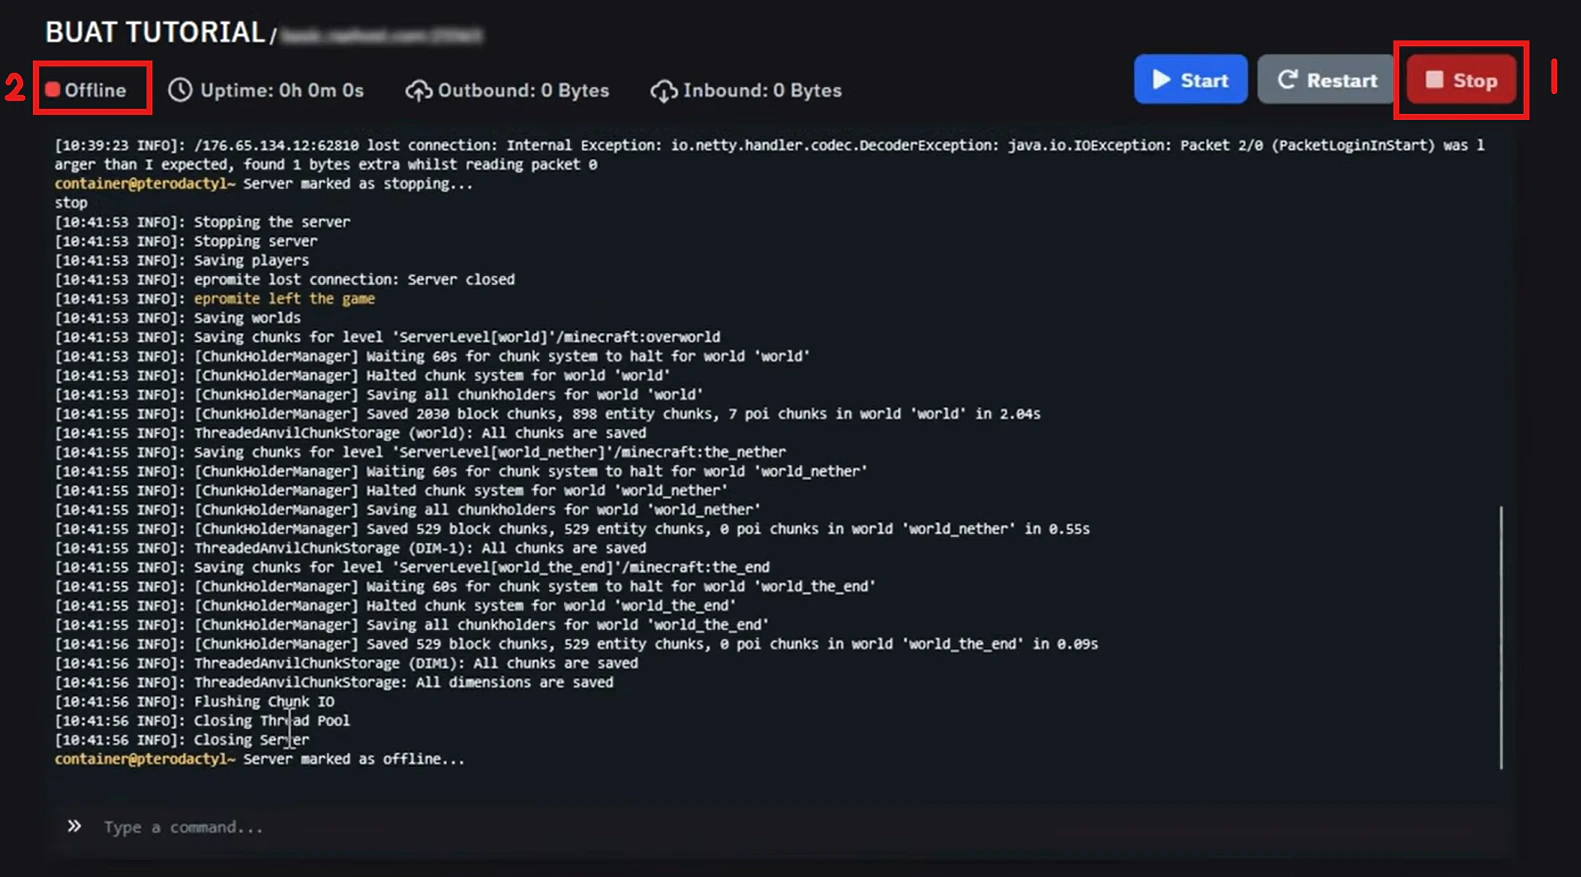
Klik tombol `Stop` seperti yang ditampilkan oleh nomor 1. Jika sudah di stop, maka server akan `offline` seperti yang ditampilkan oleh nomor 2.
> **Hanya jika kalian ingin menghapus semua file ya!**
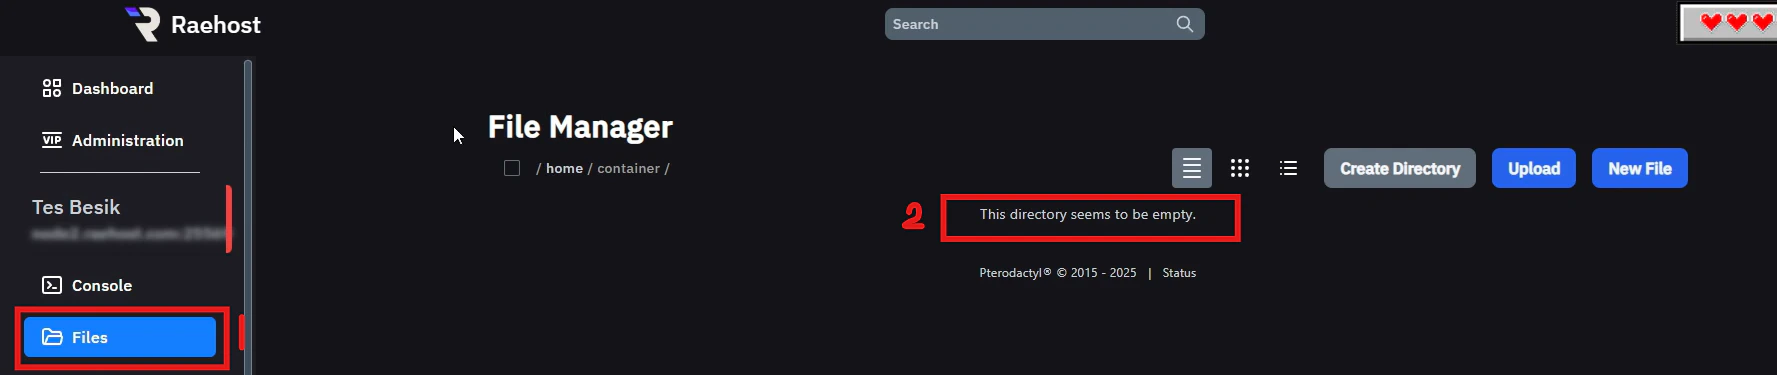
Pastikan di tab `Files`, bahwa semua file mu sudah tidak ada. Hal ini ditandai dengan `This directory seems to be empty` seperti yang ditampilkan oleh nomor 2.
Jika belum kosong (dan ingin clean install), bisa ikuti langkah-langkah ini:
1. Masuk ke tab `Files`
2. Centang seperti pada nomor 2 untuk memilih semua file
3. Klik tombol `Delete` seperti pada nomor 3
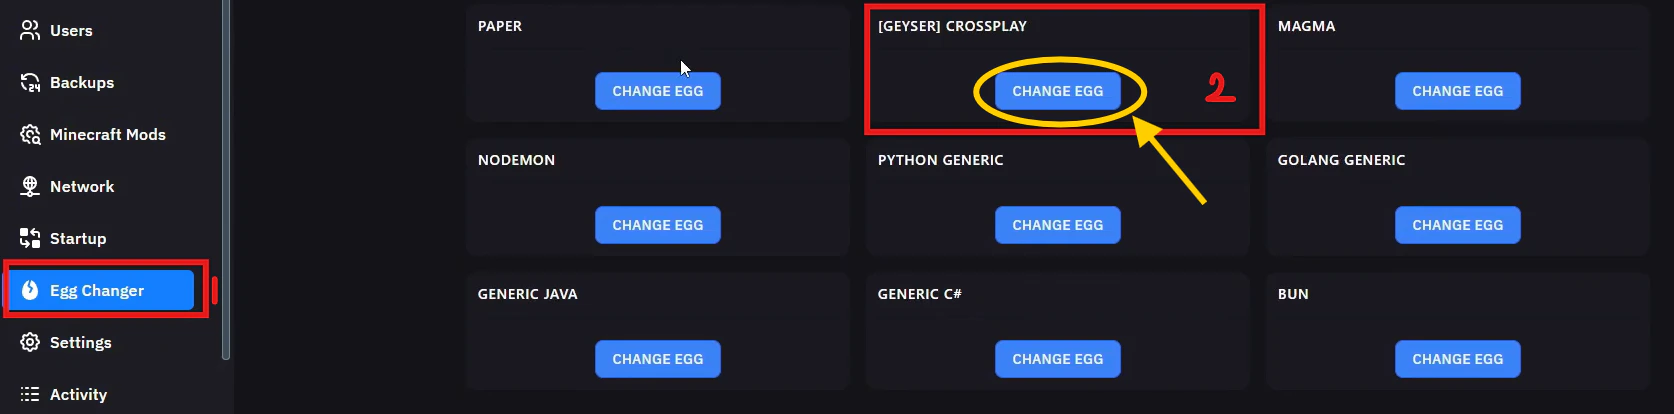
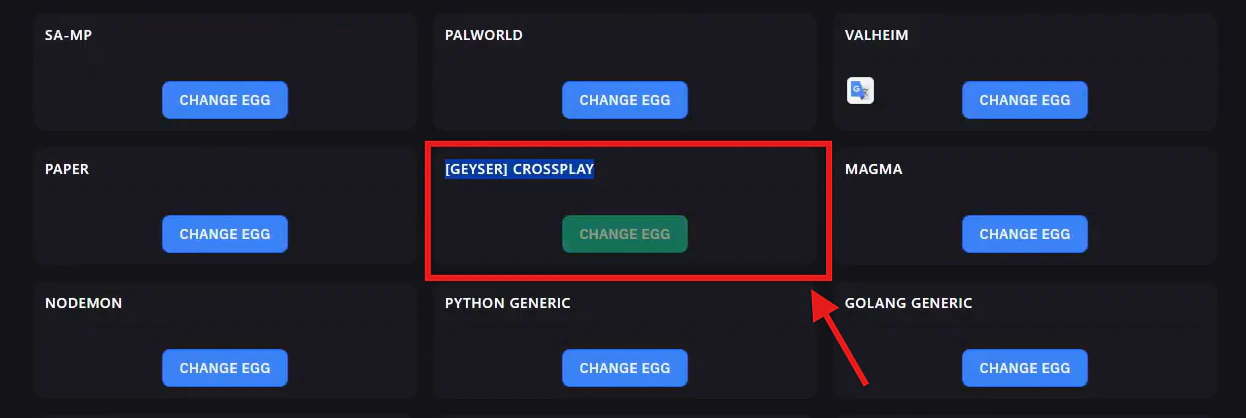
Untuk melakukan ubah egg, kamu perlu masuk ke teb `Egg Changer` dan cari egg `[GEYSER] CROSSPLAY`. Klik `Change Egg` seperti pada nomor 2.
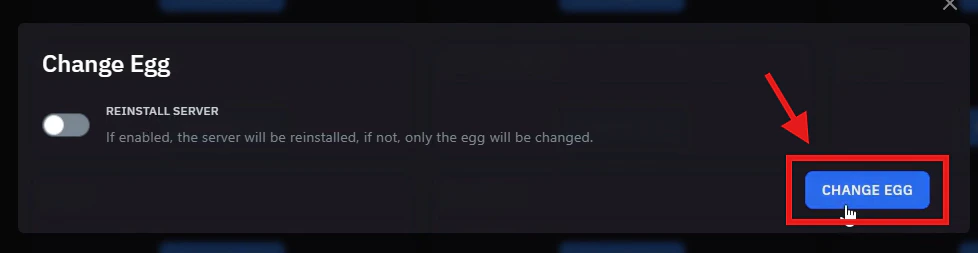
Kemudian klik tombol `Change Egg` seperti gambar dibawah ini:
Jika sudah berubah, maka tombol `Change Egg` akan berubah menjadi warna hijau seperti berikut:
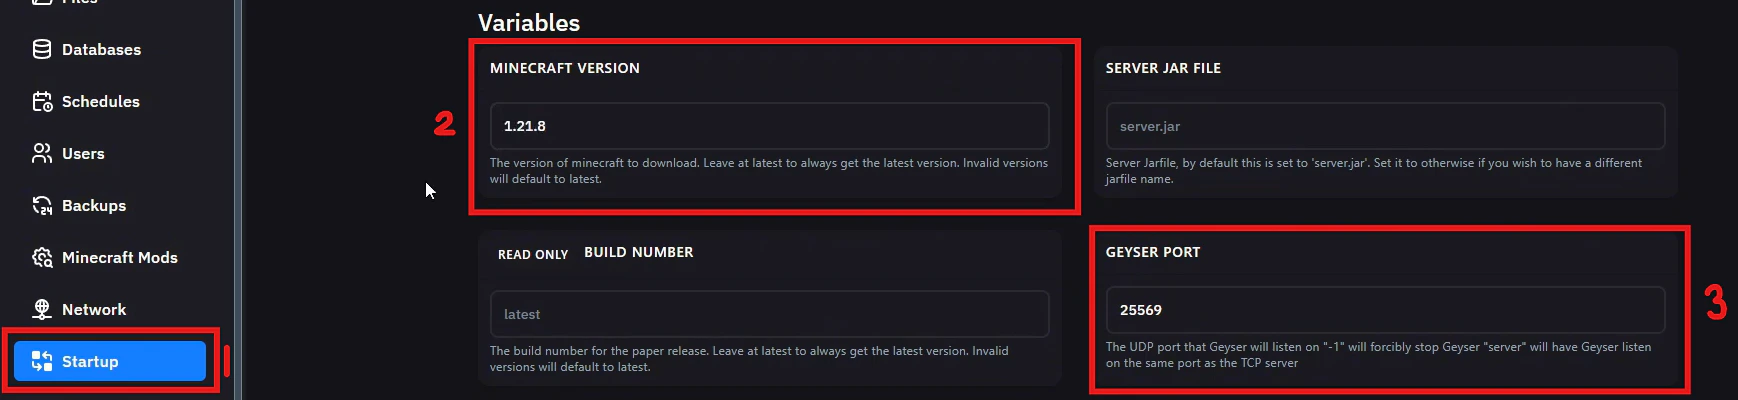
1. Masuk ke tab `Startup`
2. Pada versi minecraft, **jangan** biarkan diisi `latest` tapi isi sesuai versi terbaru.
3. Untuk port, bisa diisi dengan port pada server address yang terdapat di tab `Console`
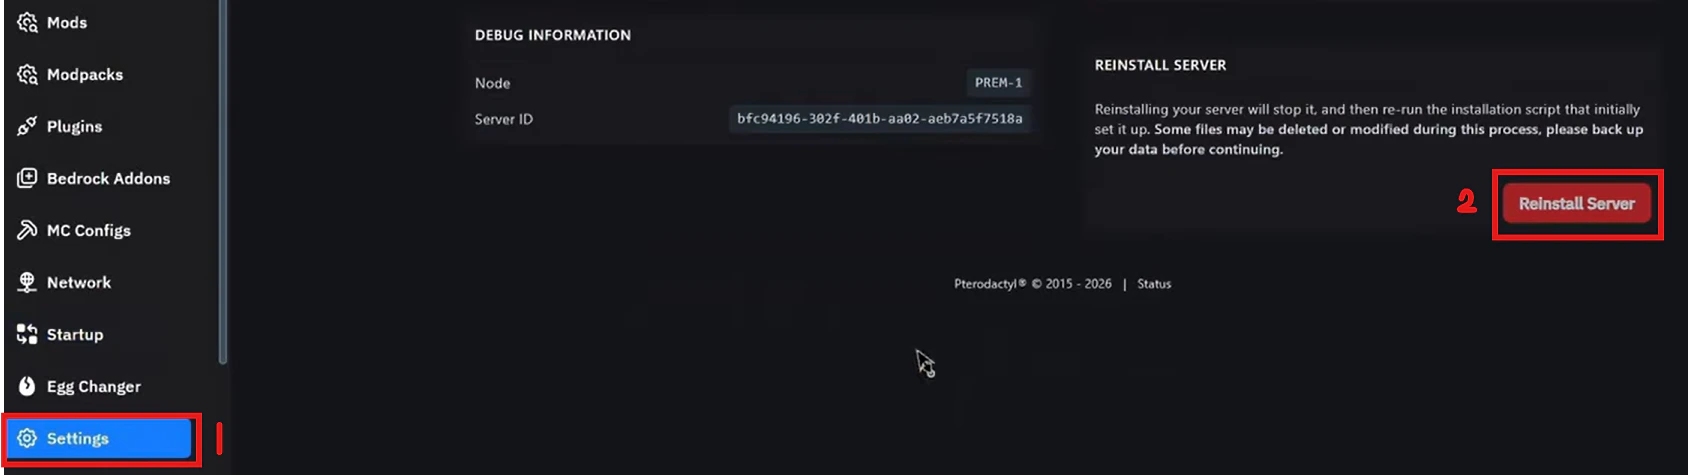
Untuk melakukan reinstall, kamu dapat masuk ke tab `Settings` seperti yang ditampilkan pada nomor 1. Untuk melakukan reinstall, kamu dapat klik tombol `Reinstall Server` seperti pada nomor 2.
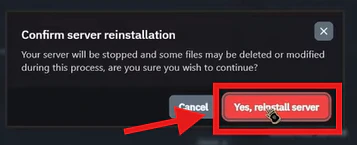
Kemudian akan muncul konfirmasi. Klik tombol `Yes, reinstall server` seperti pada gambar dibawah ini:
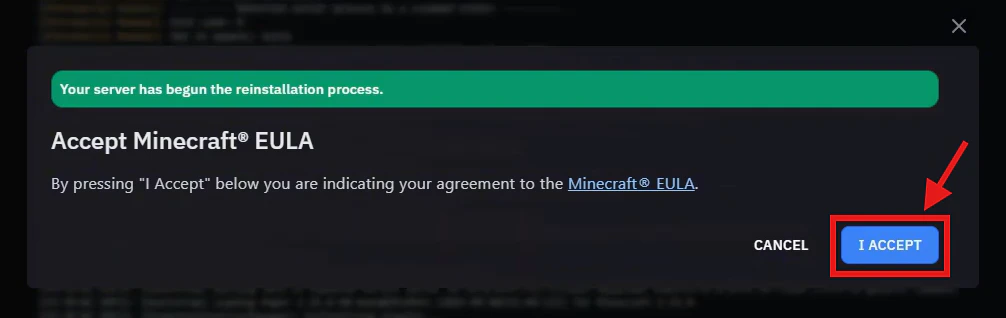
Saat sedang installing, akan muncul persetujuan seperti berikut, klik tombol `Accept`
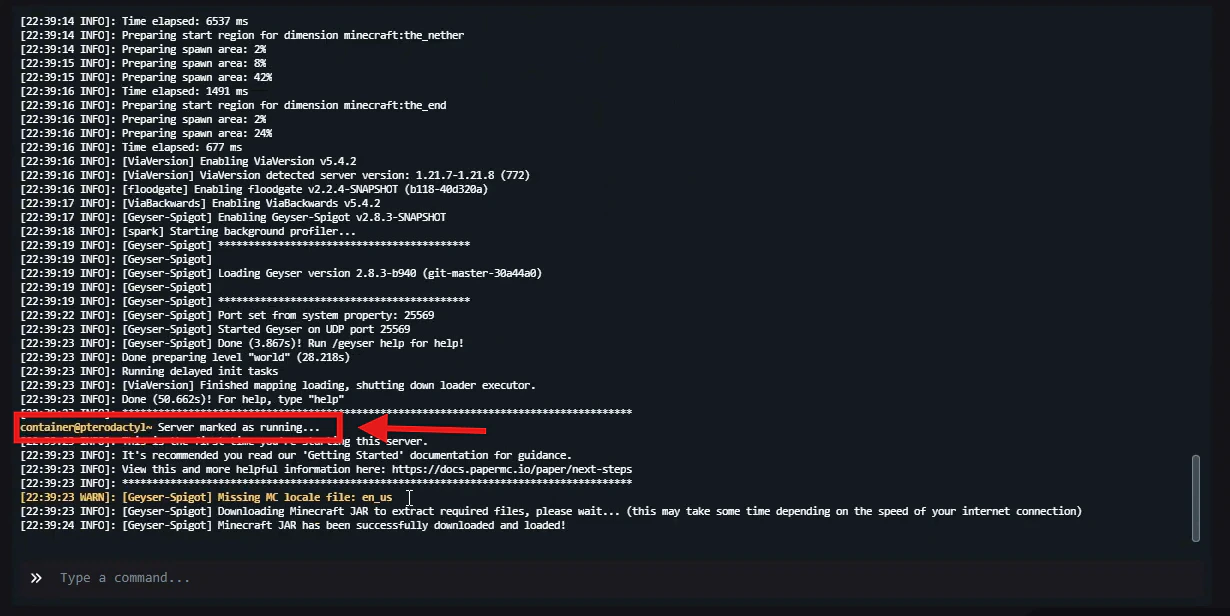
Tunggu hingga tertuli `Server mark as running` seperti gambar dibawah ini:
## **"You need a Java Edition account to play on this server"**
Hal ini dapat disebkan karena Bedrock player dianggap belum “terautentikasi” karena Geyser belum diset ke mode Floodgate. Berikut adalah solusinya:
Untuk melakukan ini, kamu perlu login ke panel melalui [https://panel.raehost.com/](https://panel.raehost.com/) Kemudian pilih servermu.
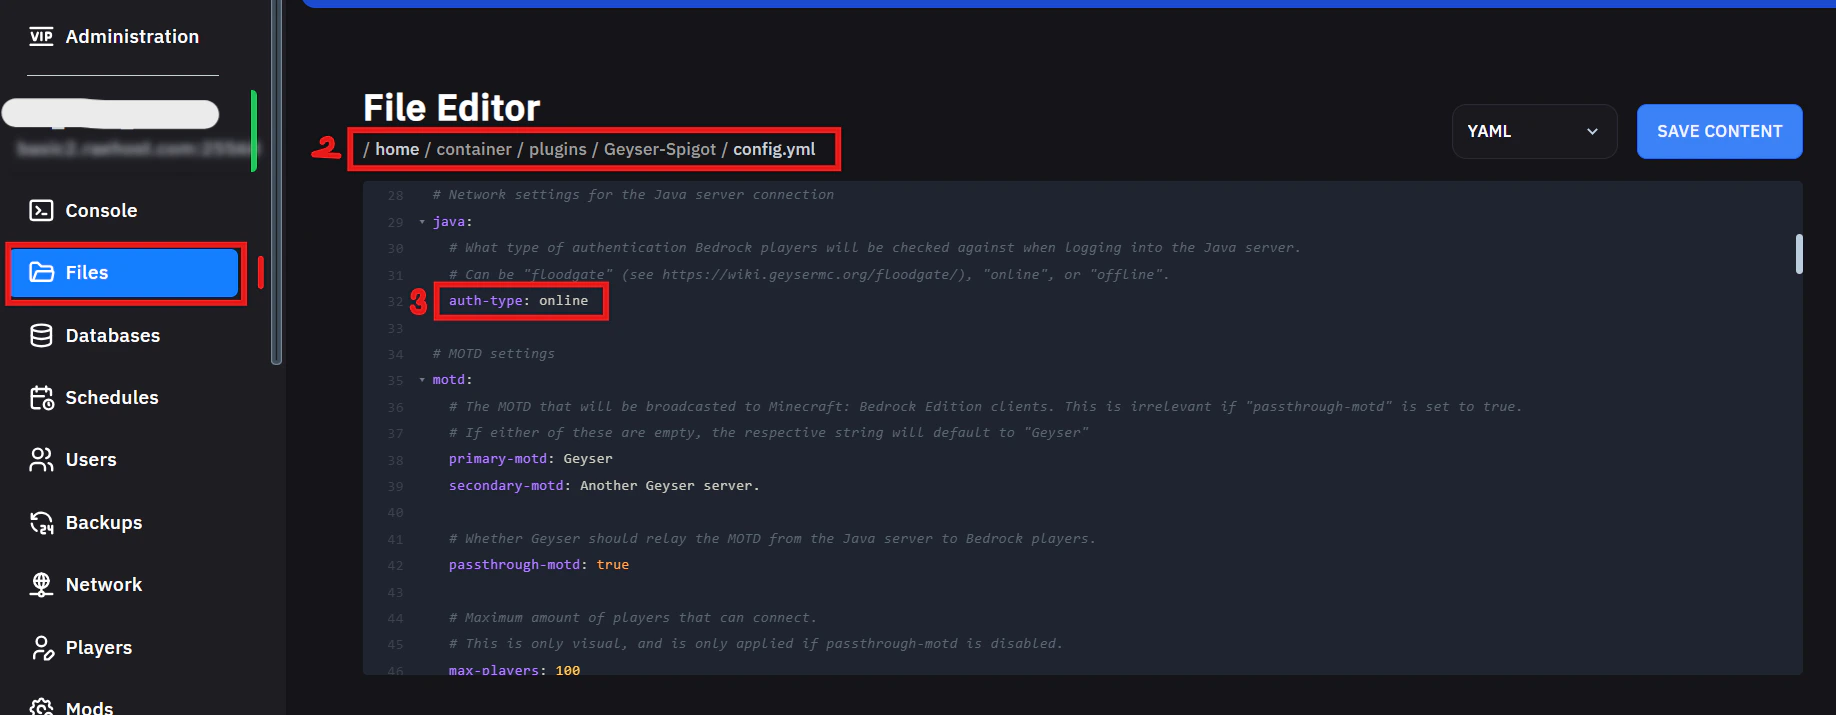
1. Masuk ke tab `Files`
2. Buka file `/plugins/Geyser-Spigot/config.yml`
3. Cari `auth-type: online`
1. Ubah menjadi `auth-type: floodgate` seperti gambar diatas
2. Setelahnya klik Save Content
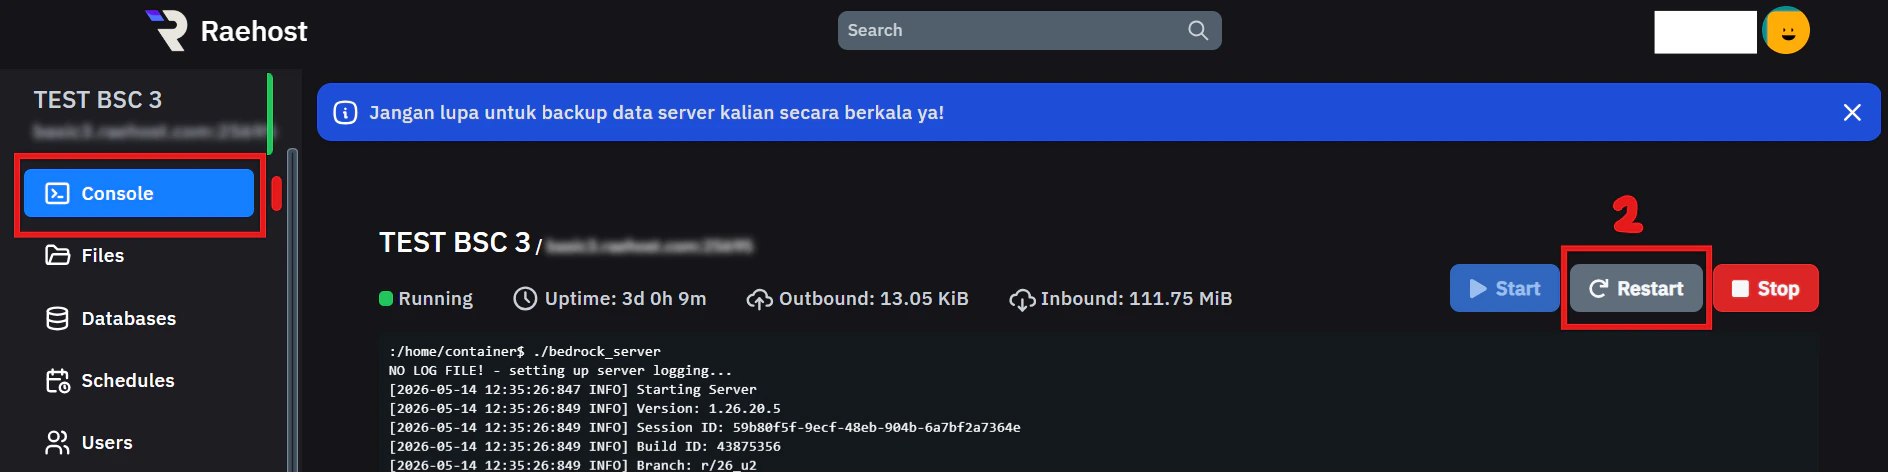
Setelahnya, pergi ke tab `Console` seperti yang ditunjukkan pada nomor 1. Kemudian klik `Restart` seperti yang ditunjukkan pada nomor 2. Spawn Protection sudah mati.
Restart server setiap kali ubah **config**
 Jika belum kosong (dan ingin clean install), bisa ikuti langkah-langkah ini:
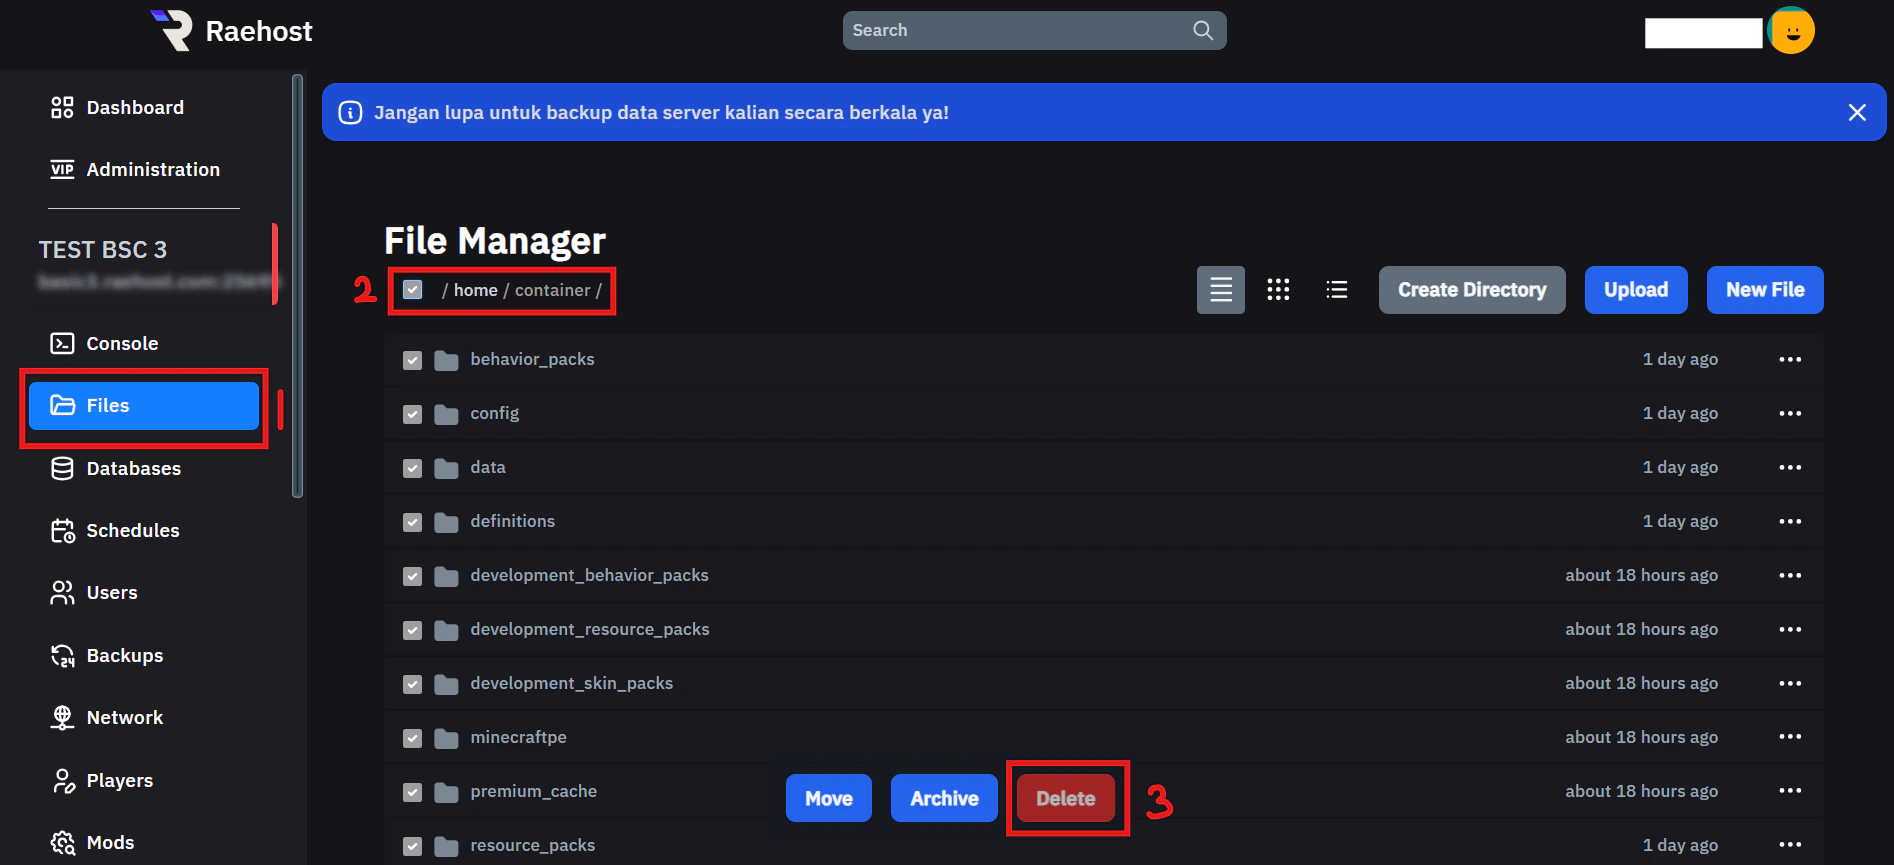 1. Masuk ke tab `Files`
2. Centang seperti pada nomor 2 untuk memilih semua file
3. Klik tombol `Delete` seperti pada nomor 3
1. Masuk ke tab `Files`
2. Centang seperti pada nomor 2 untuk memilih semua file
3. Klik tombol `Delete` seperti pada nomor 3
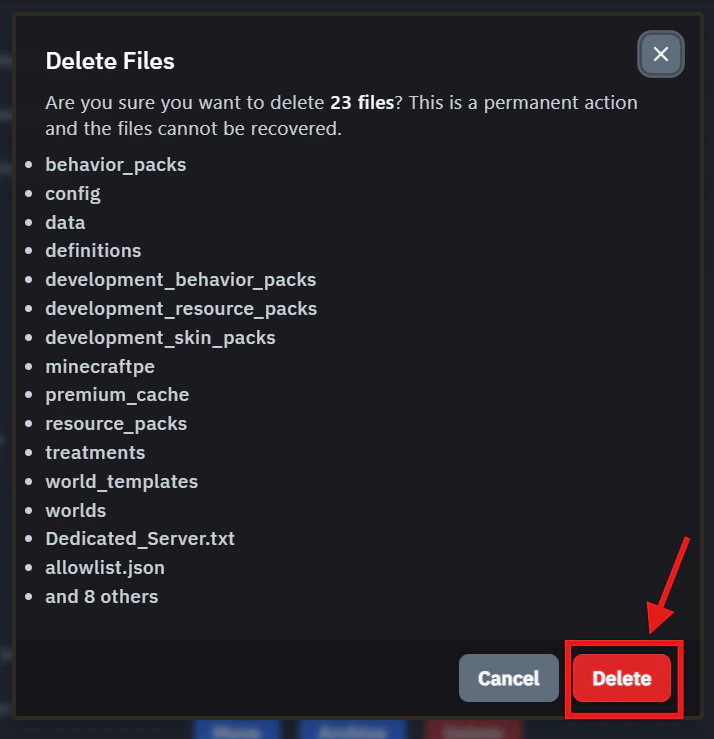
 Kemudian klik tombol `Change Egg` seperti gambar dibawah ini:
 Jika sudah berubah, maka tombol `Change Egg` akan berubah menjadi warna hijau seperti berikut:
 1. Masuk ke tab `Startup`
2. Pada versi minecraft, **jangan** biarkan diisi `latest` tapi isi sesuai versi terbaru.
3. Untuk port, bisa diisi dengan port pada server address yang terdapat di tab `Console`
1. Masuk ke tab `Startup`
2. Pada versi minecraft, **jangan** biarkan diisi `latest` tapi isi sesuai versi terbaru.
3. Untuk port, bisa diisi dengan port pada server address yang terdapat di tab `Console`
 Kemudian akan muncul konfirmasi. Klik tombol `Yes, reinstall server` seperti pada gambar dibawah ini:
 Tunggu hingga tertuli `Server mark as running` seperti gambar dibawah ini:
 1. Masuk ke tab `Files`
2. Buka file `/plugins/Geyser-Spigot/config.yml`
3. Cari `auth-type: online`
1. Masuk ke tab `Files`
2. Buka file `/plugins/Geyser-Spigot/config.yml`
3. Cari `auth-type: online`
 1. Ubah menjadi `auth-type: floodgate` seperti gambar diatas
2. Setelahnya klik Save Content
1. Ubah menjadi `auth-type: floodgate` seperti gambar diatas
2. Setelahnya klik Save Content